Who doesn’t love easy and cheap Easter crafts that anyone can do?! I know I sure do! Doing crafts for the different seasons has become such a fun part of my business and I love coming up with different ideas to share with you!
Don’t get me wrong…I love to shop! And I’ve done plenty of that this Spring too. I like to think that I’m a pretty good mix with MOST of my home being stuff that I buy and just plop in it’s place, but with a fair amount of some DIY mixed in for fun and money saving purposes!
I’m sharing 2 easy Easter signs that anyone can make so you can bring some personal touches to your home this year for Spring.

Both of these projects were done on FB lives, so I will link those lives at the END of this post for you to check out if you still want more info!
First up is this cute “Hip Hop” sign. Now listen, I did kind of laugh as I was doing this because I was like…
“Is the saying hip hop? Or is it hippity hop? Does it sound like I have an easter rap song going on?” Anywho, I ran with it and Hip Hop it was!

Details:
- Board came from Walmart in their craft section
- Letters came from Walmart in the same area
- For the “o” I used an egg cut out and attached scrapbook paper to it with mod podge
- Waverly Chalk paint from Walmart (I used agave and coral because those are my colors, but you could usy any paint here!)
- I simply painted the board and attached the letters with hot glue
- The last thing I did was attach a little piece of scrapbook paper to the back so you could see those polka dots coming through the slats just a bit
Easy and CUTE! Don’t ya think?!

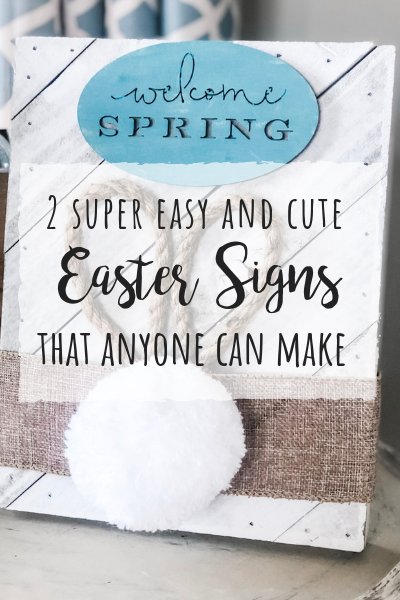
Next up is another little sign that is just toooooo cute! This could be made in about 5 minutes!
Details:
- The white board came from Walmart craft section
- The Welcome Spring sign came from Joanne’s (you could get creative here and attach something else to the top if you can’t find this one)
- The “bunny tail” came from the craft section at walmart (you could also use pom poms or cotton balls)
- Neutral ribbon that I’ve had forever
- Jute twine


For this project, I attached everything with double sided sticky tape because I wanted to be able remove everything and reuse the board. You could also attach with hot glue. All I did was paint my little welcome spring sign in the agave waverly chalk paint. I wrapped the ribbon around the bottom, made 2 loops with my jute for the look of bunny ears and then attached the tail!
This was really simple, but I think it turned out really cute too! What do you think of this one?

Which one of these is your favorite?! I really love the 2nd one the most!
Here are the FB Lives if you want to watch me make these!
I hope you enjoyed these 2 easy Easter signs and are inspired to try one (or both) for yourself!
Until next time…
Stacey


I love them both!
There bunny is SO CUTE!!! But I do love the other also!!! You help us make greast decorations at a great price… I love that about you, NEVER out of reach for us budget followers!!!!! THANK YOU!!!!
I love them both, I’m kinda of partial to the Hip Hop. Love how you painted the board !! Gave me the idea that you could use this in any room and with any saying you wanted!!