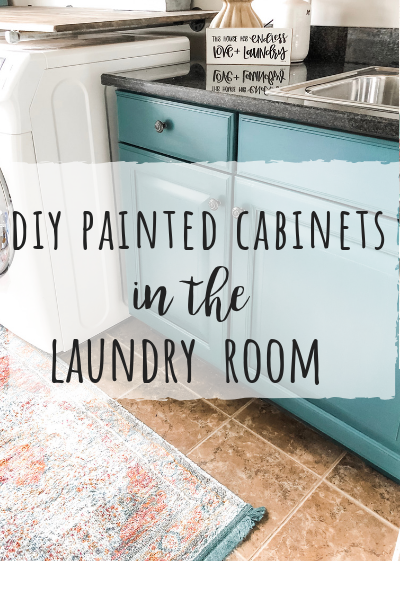
I’m so excited to share the reveal of my DIY painted cabinets in our laundry room! This is the 3rd DIY we have done in here and I love each one just a little more than the last! You can see the first one here where we did the industrial pipe shelves, and the second one which was the DIY clothing rack here.
These DIY painted cabinets in my laundry room were so easy to do and really made a world of difference in the look in here. The color just pops now!
PIN THIS FOR LATER SO YOU ALWAYS HAVE IT SAVED!

I’ve never loved the brown tile on the floor and with the brown cabinets too, it was just too much! I had been itching to paint the cabinets in there for a while and just never got around to it (like so many other projects on the list).
Until now!
My friend April at Rawhyde Furnishings is a retailer for Wise Owl paint and when she told me about their new One hour enamel product that was great for cabinets, I knew I had to try it! I picked out the color Abyss, which is a deep teal because I wanted to do something a little more fun in there!
Here are my cabinets before:


During the process of painting:


5 key takeaways for DIY painted cabinets using Wise Owl one hour enamel:
- Clean your cabinets VERY good! I used simple green degreaser (diluted it with water) and scrubbed them very well. I also took a fine grit sanding pad and sanded them to rough them up a bit to make sure the paint would adhere great. I went back over it after sanding with another wipe down of the simple green. (Note: I did not prime, but if I was doing a kitchen I definitely would prime before painting!)
- Use a GOOD paint brush to avoid seeing brush strokes! I got a cling on brush from Rawhyde Furnishings and it worked great!
- Remove the cabinet doors to make it easier to paint them. Start with the back sides of the doors so you can get a feel for the paint and how you want to do it. The back side isn’t as important after all. I was SO glad I did this!
- Don’t overwork the paint. Load up your brush and just do a couple swipes back and forth. Check for drips as you go, because the paint dries so fast and you want to catch them and fix them before they are dry.
- Don’t be nervous after the first coat, it will look streaky just like any first coat of paint. Wait a couple hours in between coats to be sure it’s fully dry. By the time that 2nd coat is drying, they should look great! (if you need to do a 3rd coat, that’s ok too) No need to add topcoat to this paint, which is AMAZING!!
Here is the after! Hope you can see why I’m so in love! What do you think?! 


I definitely recommend the one hour enamel if you are wanting to DIY painted cabinets! You can get yours here!
For me, I didn’t want to tackle a job as big as my kitchen (which is why we hired that out..you can see that process here). I wanted to ensure I had the most professional look and something that would hold up for years to come.
But, I felt like the laundry room was something I was super comfortable tackling! You can also watch the FB Live here where I painted a couple of the cabinets.
Can’t wait to hear what you think of these DIY painted cabinets!
Until next time…
Stacey
Sources:
Bamboo shades- We also added these and I love the warmth they bring to the space! Get them here!
All decor came from various places over the years!
This post contains affiliate links. Please see our full disclosure page for more details.


Beautiful…simply beautiful! I am attempting to get up enough courage to paint my kitchen cabinets; so, I am most grateful for the tips!
Absolutely love the new colour!!! You did a great job!!
Love, love, LOVE how they turned out!!
It looks gorgeous, you did a great job!! ?
You did a great job! They are absolutely beautiful! The color is gorgeous! Beautiful laundry room! 🙂
❤️❤️❤️ I went on the website but didn’t see your color. Is it new?
I don’t believe so. It’s under the one hour enamel paint by Wise Owl (color Abyss). Thanks!
Gorgeous. You did a great job
Love your dyi projects. cabinets are beautiful! Great job!
Gorgeous! I want to try this in my bathroom!